 Gloria Davis
A hop shoot climbs by winding around its support, its rough stem finding purchase as it rises. By late summer, the same plant may carry pale green cones beneath its leaves. Raising hop plants in a garden begins with a strong place to climb and a sunny site; tending a backyard hop crop also means planning for a perennial crown that will return and spread over time.
Growing Hops at Home Starts With the Right Plant
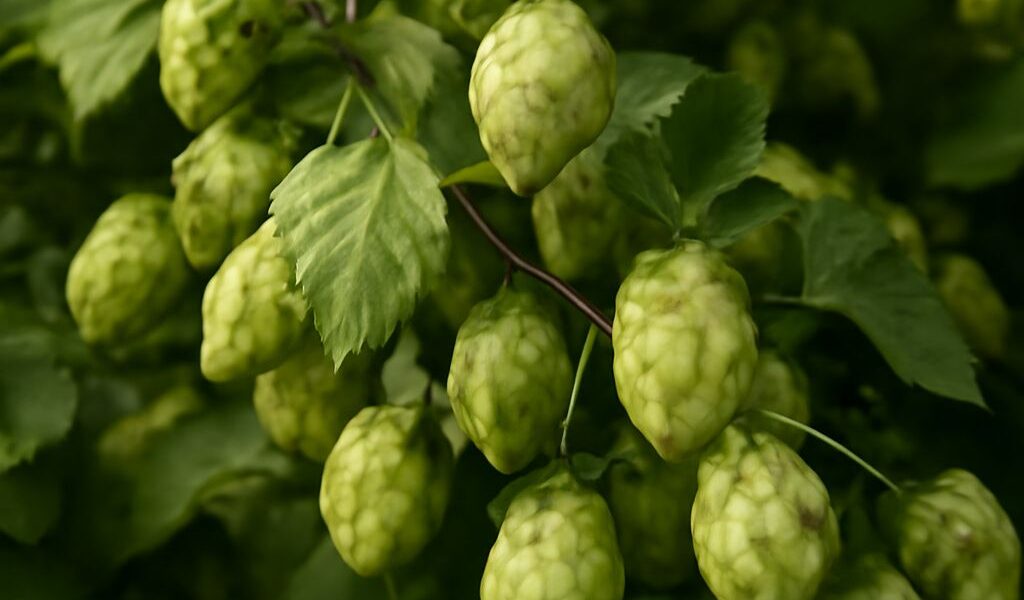
The hop used for brewing is Humulus lupulus, a perennial whose aboveground stems die back while the crown persists underground. Its climbing stems are called bines: they twine around a support and grip with stiff hairs. Female plants produce the cones used by brewers; a female plant can form usable cones without a male plant nearby.
Do not confuse common hop with Japanese hop, Humulus japonicus, also known as H. scandens. Introduced as an ornamental, it is invasive in parts of the United States and can overgrow other vegetation, according to a 2024 University of Maryland Extension guide. Buy a clearly identified culinary cultivar rather than selecting an unidentified decorative climber by its common name.
For growing hops at home, choose a named female plant or rhizome from a reputable supplier. Rhizomes are pieces of underground stem that can produce a plant with the parent cultivar’s characteristics. Look for sound planting material and ask how the cultivar performs in your local climate. If brewing is your goal, compare intended aroma or bitterness as well as disease resistance and harvest season; the same cultivar may behave differently across regions.
Give the Bines a Strong Route Up
Before planting hops, decide where the entire mature plant will go. Oregon State University’s home-growing guide, published in 2015, notes that bines commonly reach 15 to 20 feet, sometimes higher. A shorter trellis can work for a home garden, but a crowded or low support may limit the amount of cone-bearing growth.
Install a sturdy, securely anchored trellis before vigorous growth begins. Strong posts with rough twine or another grippable climbing line give the bines a route upward. Consider the weight of mature foliage and wind, keep the structure clear of overhead wires, and plan how you will reach or lower the lines for harvest. A fence or living tree can become difficult to disentangle once the plant has climbed it.
In spring, guide several healthy shoots clockwise around the support. Their hooked hairs help them hold on, but check them after wind and redirect wandering growth before it reaches nearby shrubs. Wear gloves and long sleeves if the rough stems irritate your skin. When raising young hop plants, allow them to establish roots and avoid stripping away their leaves in the first season simply to make them look tidy.
Plant in Sun and Care for the Soil
Choose a sunny site with good drainage and enough space around the crown for future growth. In spring, when soil can be worked, set a nursery plant at the same depth it occupied in its pot. For rhizomes, follow the supplier’s orientation and depth instructions; Oregon State describes setting a rhizome vertically with its top just below the soil surface. Water after planting to settle the soil.
Soil should retain some moisture without remaining soggy. Incorporate compost into the planting area when it helps improve the soil, and use mulch to reduce evaporation while keeping the crown visible. Water consistently during active growth, especially in hot, dry weather, but let the soil’s condition guide you: standing water and continually saturated ground can damage roots.
To grow hops well over several seasons, observe the leaves and test the soil if fertility is uncertain. Feed according to a local soil test or an appropriate garden fertilizer label rather than applying heavy doses by habit. Extra nitrogen can encourage leafy growth without solving a problem caused by shade, waterlogging or disease.
Cultivating hop plants in your own yard means accounting for local day length and growing conditions; yield and ripening can differ by cultivar. Ask local growers or extension staff which selections perform in your area. First-year plants put much of their energy into establishing roots, so a small harvest is not necessarily a failure; Oregon State notes that plants often reach full production in their second or third season.
Watch, Harvest and Prepare for Winter
Inspect foliage throughout summer for insects, unusual spots or mildew. Maintain airflow around the plant and remove badly affected material; if a problem persists, ask your local extension office for identification before choosing a treatment. Because rhizomes can spread beyond the original crown, watch for shoots appearing where you do not want them and remove them while small.
As harvest approaches, sample cones from several places on the plant. Mature cones tend to feel light and papery, with yellow lupulin inside and a pleasant hop aroma. Timing depends on cultivar and weather; soft, damp-feeling cones may need more time. Pick individual cones or lower a removable climbing line, taking care with the weight and height of the bines.
Use fresh cones promptly, or dry them in a thin layer with good airflow before sealing and freezing them for later use. Keep harvested and spent hops away from dogs: the ASPCA warns that hops can be dangerous to them. If a dog eats hops, contact a veterinarian immediately.
After harvest and seasonal dieback, cut the dead bines down and clear the support. Leave the perennial crown in the ground where the cultivar is hardy, and protect it with mulch as appropriate for your climate. In spring, check for new shoots and train them; in late summer or fall, let the cones’ texture and aroma guide the next harvest.