 Gloria Glover
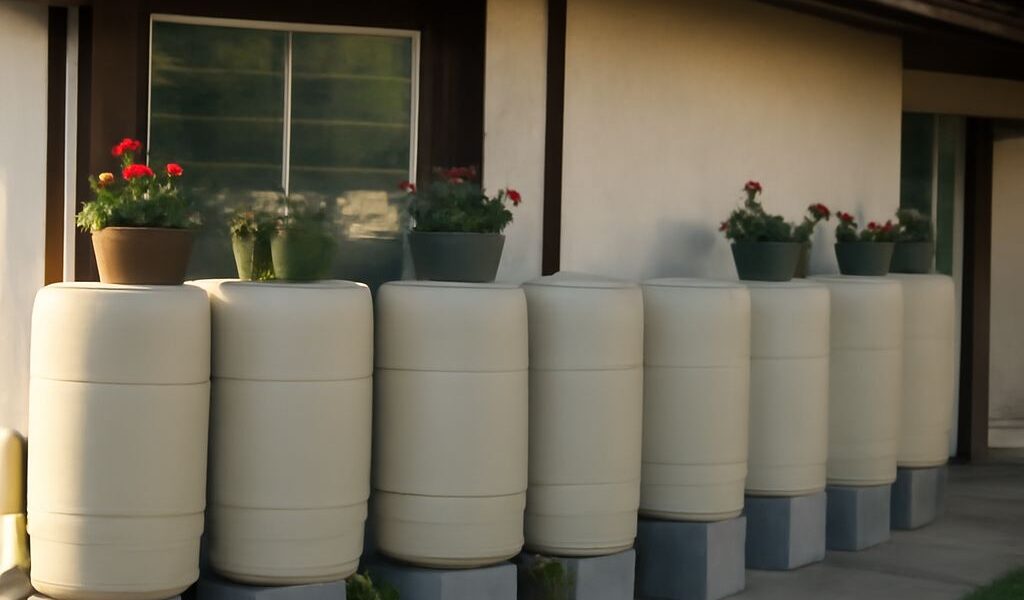
 Rainwater barrels capture roof runoff for garden irrigation, but a safe setup must control the entire water path. We route water from the downspout through a screened inlet into a covered container, then direct excess water through an overflow and release stored water through a low-pressure outlet.
For sizing, use this estimate: roof area in square feet × rainfall in inches × 0.623 × 0.8 equals approximate gallons collected. A 1,000-square-foot roof receiving 1 inch of rain can produce about 498 gallons after allowing for losses, so a 50- to 100-gallon barrel may fill quickly. Treat untreated roof runoff as nonpotable and use it only for irrigation.
How Rainwater Barrels Route Roof Runoff
From downspout to screened inlet and overflow
Rain falls on the roof, enters the gutter, and travels down the downspout. A diverter or downspout adapter sends that flow to the rain barrel’s screened inlet. The screen blocks leaves and helps exclude mosquitoes while the lid keeps the opening covered.
As the container fills, water should leave through a sealed overflow fitting near the top rather than spill around the lid. A tap or hose bib near the bottom provides controlled, low-pressure flow for a watering can or soaker hose. The barrel is not a pressurized water tank, so do not connect it directly to household plumbing.
Size capacity from roof area, rainfall, and water demand
Choose capacity based on the roof section feeding one downspout, local rainfall patterns, and how often the garden needs water. Smaller rainwater barrels work for occasional hand watering; multiple linked barrels provide more storage where the roof catchment is large. Leave enough space for an overflow path even when the container is full.
Parts and Site Preparation for a Rainwater Collection Barrel
Choose a suitable rain barrel and location
Use a purpose-built, opaque, lidded container made for water storage, or a clean food-grade container that never held chemicals. Pick a location close to the selected downspout and garden, but keep the barrel away from foundations, crawl-space vents, and busy walkways. The surface must remain level when wet and support the full weight; 50 gallons of water weighs more than 400 pounds.
Place the barrel where the outlet is convenient to reach. Elevate it only on a solid, load-rated platform that cannot shift. Greater height improves gravity flow slightly, but a rain barrel still produces low pressure.
Gather the container, screened inlet, overflow, outlet, stable base, and downspout connection
- A lidded rain barrel or other suitable storage container
- A fine-mesh screened inlet or screened lid opening
- A bulkhead fitting and tap for the low-pressure outlet
- A high-side overflow fitting, hose, and clamps
- A solid, level base of concrete, pavers, or a rated stand
- A downspout diverter, adapter, flexible connector, and leaf screen
- Drill bits, a hole saw matched to the fittings, sealant, and a wrench
Step-by-Step: Build a DIY Rain Barrel System
1. Set the container on a level, stable base
- Choose the downspout and mark a site where overflow can drain safely. Build the base wider than the barrel, check it with a level, and set the empty container in place.
- Confirm that the downspout outlet can reach the barrel inlet without creating a sharp bend or unsupported connection. Keep the lid accessible for inspection.
2. Attach the downspout to the screened inlet
- Cut or disconnect the downspout at the height specified by the diverter instructions. Install the diverter or adapter, then connect its hose to the screened inlet.
- Secure every connection and ensure the screen is tight enough that insects cannot enter. Keep the inlet covered; an open downspout connection invites debris and mosquitoes.
3. Fit the low-pressure outlet and controlled overflow
- Drill the outlet hole near the bottom, install the bulkhead fitting and washer, and tighten it without distorting the container. Add thread sealant if the fitting instructions require it.
- Install the overflow fitting several inches below the lid. Attach a hose large enough for the expected flow and clamp it securely.
4. Test the full water path before use
- Run a hose into the downspout connection, not directly into an uncovered barrel. Check the inlet, outlet, and fittings for leaks while the barrel fills.
- Verify that overflow exits well away from the foundation and that opening the tap produces a controlled stream. Tighten or reseal fittings before collecting a storm’s runoff.
Overflow, Maintenance, and Seasonal Care
Route overflow away from foundations and walkways
Direct overflow downhill to a planted area, rain garden, or other stable drainage point at least several feet from the foundation. Secure the hose so it cannot whip loose or create a muddy walkway. If the barrel repeatedly overflows, add storage or improve the diverter rather than allowing water to pool beside the building.
Keep mosquitoes out and clean the barrel
Inspect the lid, inlet screen, and overflow screen after heavy weather. Remove leaves from the gutter and screen, and empty sediment from the bottom when flow slows. At least once a year, drain and rinse the container; scrub buildup with a suitable cleaner, rinse thoroughly, and check seals before reconnecting it.
Drain before freezing weather and use collected water only for irrigation
Before a freeze, disconnect the downspout, empty the barrel and hoses, open the tap, and store removable fittings where they will not freeze. Use the stored water on ornamental plants, trees, or lawns—not for drinking, cooking, bathing, or other household consumption.